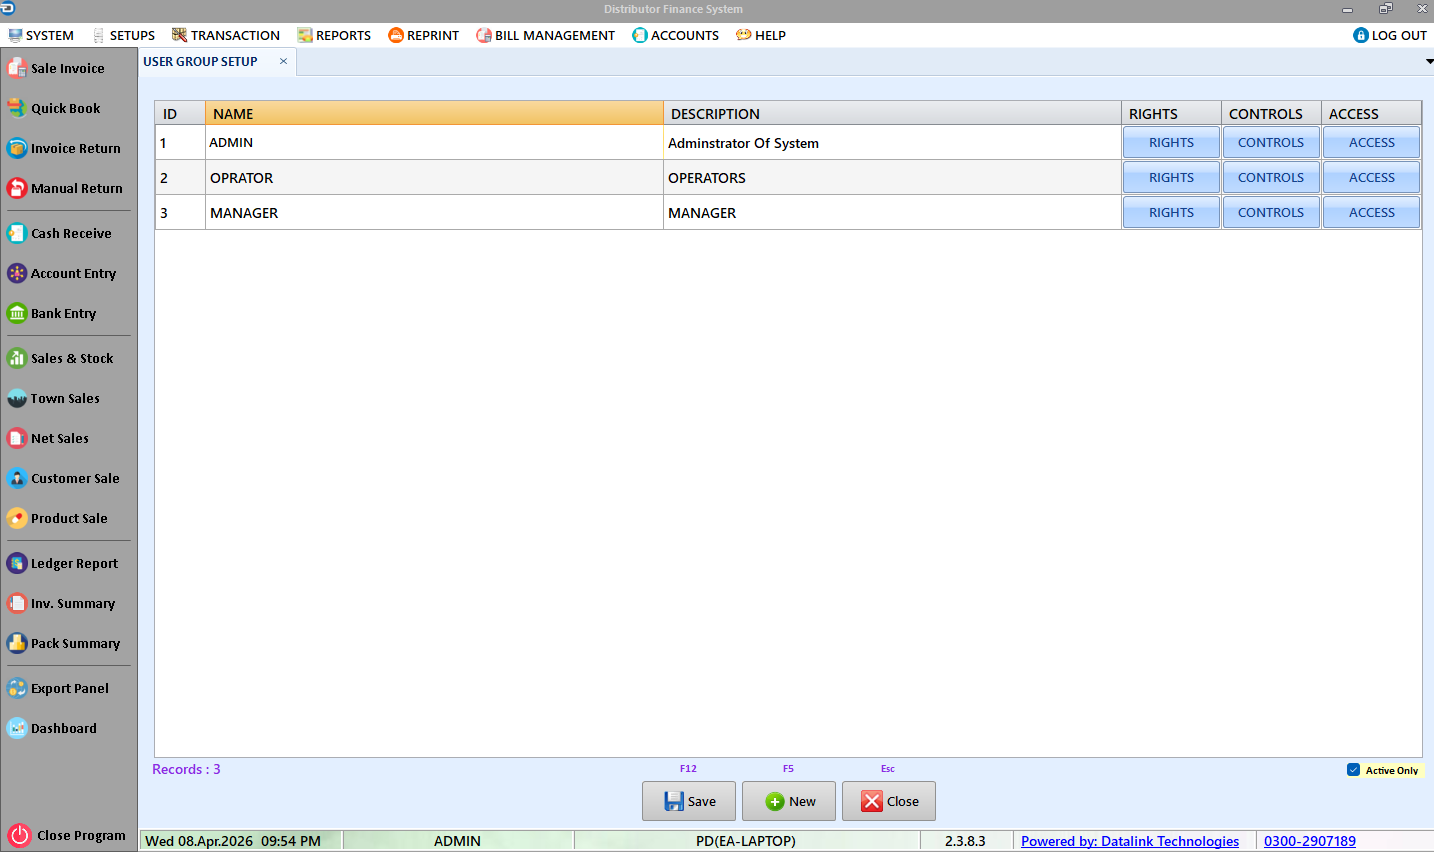
User Group Setup
Define user roles and configure menu access rights, control-level permissions, and company data visibility.
How to Open
Menu → Setups → User Group
Keyboard Shortcuts
F12 Save F5 New/Clear Esc Close
🖼️
Form Preview
📝
How to Use
➕ Adding a New Row
- Open User Group Setup from the menu
- Select the filter dropdown if applicable
- Click New to add a blank row at the bottom of the grid
- Fill in the required columns
- Press F12 or click Save
✏️ Editing Existing Rows
- Select the row you want to edit in the grid
- Click on the cell and modify the value
- Modified rows will turn light yellow
- Press F12 or click Save to save all changes
📋
Field Descriptions
📊
Grid Columns
| Column | Type | Required | Description |
|---|---|---|---|
| Group Name | Text | ✅ | Name of the user group / role (e.g., Admin, Sales, Accountant). |
| Description | Text | Description of the role and its intended access level. | |
| Menu Rights | Button | Click to open a popup with a checklist of all menu items. Check the menus this group is allowed to access. | |
| Controls | Button | Click to set control-level permissions — fine-grained access like editing balances (ctbal, cpbal), deleting records (cdel, pdel), and managing stock (new_batch). | |
| Company Access | Button | Click to select which companies and product groups this user group can see and work with. |
🔘
Buttons
| Button | Shortcut | What it Does |
|---|---|---|
| 💾 Save | F12 | Saves all changes. The system will ask for confirmation before saving. |
| ➕ New | F5 | Adds a new blank row to the grid for data entry. |
| ❌ Close | Esc | Closes the User Group Setup screen. |
💡
Important Notes
Admin Only: Only administrators should modify user group permissions. Incorrect settings can lock users out of essential features.
Key Control Permissions: ctbal = Edit customer balance, cpbal = Edit company balance, cdel = Toggle customer active, pdel = Toggle product active, new_batch = Add new stock batches.